honeywell th6210u2001 installation manual pdf
Honeywell TH6210U2001 Installation Manual PDF: A Comprehensive Guide

This manual provides detailed instructions for installing and configuring your Honeywell TH6210U2001 thermostat‚ ensuring optimal performance and user experience․
The Honeywell TH6210U2001 is a programmable thermostat designed to provide efficient and convenient control of your home’s heating and cooling systems․ This user manual serves as a comprehensive guide‚ walking you through every step – from initial setup and installation to advanced programming and troubleshooting․ It’s crafted to empower both seasoned DIY enthusiasts and those new to smart home technology․
Understanding your thermostat’s capabilities is key to maximizing energy savings and comfort․ This guide details features like scheduling‚ temperature adjustments‚ and potential Wi-Fi connectivity․ We aim to provide clarity‚ ensuring a smooth and successful installation process․ Welcome to enhanced home climate control!
Package Contents & Verification
Before beginning installation‚ carefully verify the contents of your Honeywell TH6210U2001 package․ You should find the thermostat unit itself‚ a mounting backplate for wall attachment‚ screws and wall anchors for secure installation‚ and wire labels to aid in proper wiring connections․
A detailed installation manual‚ like this one‚ is also included․ Crucially‚ inspect all components for any signs of damage during shipping․ If anything is missing or appears damaged‚ do not proceed․ Contact Honeywell support immediately for assistance and replacements․ Proper verification ensures a hassle-free installation and optimal thermostat performance․
Safety Precautions
Prioritize safety during the Honeywell TH6210U2001 installation process․ Always disconnect power to your HVAC system at the breaker box before beginning any wiring work․ This prevents electrical shock and potential damage to your equipment․
If you are uncomfortable working with electrical wiring‚ consult a qualified HVAC technician․ Wear appropriate safety glasses to protect your eyes․ Be mindful of potential hazards like sharp edges on the wall or within the existing thermostat setup․ Never attempt installation during wet conditions․ Following these precautions ensures a safe and successful installation‚ protecting both you and your HVAC system․
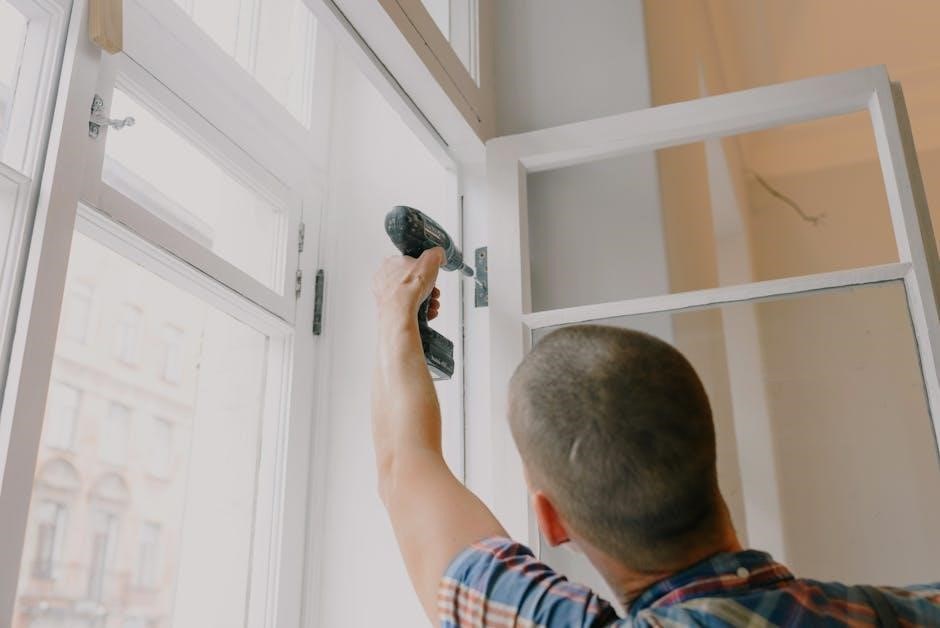
Tools Required for Installation

Proper tools are essential for a smooth Honeywell TH6210U2001 installation․ You will need a Phillips head screwdriver for mounting the backplate and connecting wires․ A small flathead screwdriver can be useful for terminal connections․ Wire strippers are crucial for preparing the thermostat wires‚ ensuring clean and secure connections․
A level is recommended to ensure the thermostat is mounted straight․ A pencil is helpful for marking screw locations․ Consider having a digital multimeter to verify power is off before wiring․ Finally‚ a smartphone or tablet will be needed for Wi-Fi setup and mobile app configuration․ Having these tools readily available streamlines the installation process․
System Compatibility Check
Before installing the Honeywell TH6210U2001‚ verify your HVAC system’s compatibility․ This thermostat generally supports most 24V heating and cooling systems‚ including furnaces‚ air conditioners‚ heat pumps‚ and boilers․ However‚ it’s crucial to confirm compatibility with millivolt systems or proprietary communication protocols․
Voltage Requirements: The TH6210U2001 requires a standard 24VAC power supply․ Ensure your system provides this voltage․ Incorrect voltage can damage the thermostat․ Check your existing thermostat wiring to identify the common (C) wire; a C-wire is often required for optimal performance․ If a C-wire isn’t present‚ a C-wire adapter may be necessary for proper operation․
HVAC System Types Supported

The Honeywell TH6210U2001 thermostat is designed for broad compatibility with common HVAC systems․ It effectively manages forced air furnaces (gas‚ oil‚ electric)‚ central air conditioning units‚ and heat pump systems․ Support extends to conventional heating and cooling‚ alongside heat pump configurations with auxiliary or emergency heat․
However‚ limitations exist․ This thermostat isn’t directly compatible with line voltage systems (120V/240V) or systems utilizing proprietary communication protocols beyond standard HVAC wiring․ Systems with modulating furnaces or advanced zoning may require additional adapters or aren’t fully supported․ Always verify compatibility before installation to avoid issues․
Voltage Requirements
The Honeywell TH6210U2001 thermostat operates on a standard 24VAC (Volts Alternating Current) low-voltage system․ This is the typical voltage supplied by most residential HVAC systems for thermostat control․ Do not connect this thermostat to line voltage (120V/240V) as it will cause severe damage and poses a safety hazard․
Proper voltage is crucial for correct operation․ Ensure your HVAC system provides a stable 24VAC supply․ A multimeter can verify this before wiring․ If your system doesn’t meet this requirement‚ consult a qualified HVAC technician․ Incorrect voltage can lead to thermostat malfunction‚ inaccurate temperature readings‚ or system failure․ Always disconnect power before any wiring work․
Wiring Diagram Overview
The Honeywell TH6210U2001 utilizes a standard color-coded wiring system for compatibility with most HVAC setups․ A detailed wiring diagram is essential for correct installation․ Common terminals include Rh (power)‚ Rc (cooling power)‚ W (heat)‚ Y (cooling)‚ G (fan)‚ and C (common – required for consistent power)․
Carefully compare your existing thermostat’s wiring to the diagram in this manual․ Incorrect wiring can damage your HVAC system or the thermostat itself․ Always label wires before disconnecting the old thermostat․ The ‘C’ wire is often the most crucial addition for reliable operation․ If a ‘C’ wire isn’t present‚ an adapter may be necessary․
Step-by-Step Installation Guide
Begin by turning off power to your HVAC system at the breaker box – safety first! Next‚ carefully remove your old thermostat‚ labeling each wire as you disconnect it․ Mount the TH6210U2001 backplate to the wall using the provided screws‚ ensuring it’s level․
Connect the wires to the corresponding terminals on the new thermostat’s backplate‚ referencing the wiring diagram․ Securely attach the thermostat display unit to the backplate․ Restore power at the breaker․ The thermostat should power on and initiate the setup process․ Follow the on-screen prompts to complete the initial configuration․
Removing the Old Thermostat
Before starting‚ absolutely turn off power to your HVAC system at the circuit breaker! This is a crucial safety step․ Carefully remove the cover of your existing thermostat‚ often by gently prying it off or releasing a clip․

Take a clear photo of the existing wiring – this will be an invaluable reference during the installation of your new Honeywell TH6210U2001․ Label each wire with the corresponding terminal letter before disconnecting them․ Disconnect the wires one at a time to avoid confusion․ Remove the old thermostat’s mounting plate from the wall․
Mounting the TH6210U2001 Backplate
Position the Honeywell TH6210U2001 backplate on the wall where the old thermostat was located‚ ensuring it’s level․ Use the provided screws and wall anchors (if needed) to securely attach the backplate to the wall․
Ensure the backplate is firmly mounted and doesn’t wobble․ A secure mounting is essential for proper thermostat operation․ Feed the thermostat wires through the opening in the backplate․ Double-check that the wires are not pinched or damaged during this process․ Proper wire placement now simplifies the connection stage later․
Connecting the Wires (Detailed)
Carefully connect the wires to the corresponding terminals on the TH6210U2001 backplate․ Refer to the wiring diagram – typically labeled R‚ C‚ W‚ Y‚ and G – and match the wire colors to the correct terminals․ Ensure each wire is securely fastened to its terminal; a loose connection can cause malfunctions․
Use a small screwdriver to tighten the terminal screws․ Avoid over-tightening‚ which could damage the terminals․ If you’re unsure about any wire connection‚ consult a qualified HVAC technician․ Double-check all connections before proceeding to the next step to prevent potential issues․
Powering On and Initial Setup
After securely connecting all wires‚ restore power to your HVAC system at the breaker box․ The Honeywell TH6210U2001 should power on automatically‚ displaying the welcome screen․ Follow the on-screen prompts to begin the initial setup process․ This typically involves selecting your system type – furnace‚ heat pump‚ or air conditioner – and configuring basic settings․

The thermostat will guide you through language selection‚ date and time settings‚ and zip code entry for accurate weather information․ Pay close attention to each step to ensure correct configuration․ A successful initial setup is crucial for optimal thermostat performance․
Programming the Thermostat
The Honeywell TH6210U2001 offers flexible programming options to optimize comfort and energy savings․ Access the programming menu through the thermostat’s interface․ You can create customized schedules tailored to your daily routine‚ setting different temperatures for wake‚ leave‚ return‚ and sleep periods․ Consider your lifestyle when designing your schedule for maximum efficiency․
Explore the various programming modes‚ including 7-day‚ 5-2 day‚ and one-week programming․ Utilize the hold function for temporary overrides when your schedule changes․ Regularly reviewing and adjusting your program ensures continued energy savings and personalized comfort throughout the year․
Setting the Date and Time
Accurate date and time settings are crucial for proper thermostat operation and scheduling․ To set the date and time on your Honeywell TH6210U2001‚ navigate to the settings menu using the thermostat’s control buttons․ Typically‚ you’ll find options to adjust the year‚ month‚ day‚ hour‚ and minute․ Ensure you select the correct AM or PM designation․
Double-check your entries before saving‚ as incorrect settings can affect programmed schedules․ Some models may offer automatic date and time updates via Wi-Fi connectivity‚ simplifying this process․ Refer to the full manual for specific button sequences and menu navigation instructions for your particular model․
Creating a Schedule
The Honeywell TH6210U2001 excels with its programmable scheduling capabilities‚ allowing customized temperature settings throughout the day․ Access the scheduling menu through the thermostat’s interface․ You can typically define different periods – such as Wake‚ Leave‚ Return‚ and Sleep – and assign specific temperatures to each․
Consider your daily routine when creating your schedule to maximize energy savings and comfort․ Many models support 7-day or 5-2 day schedules (weekday/weekend)․ Explore options for temporary holds and vacation modes for added flexibility․ Detailed instructions within the PDF manual will guide you through each step of schedule creation and modification․
Troubleshooting Common Issues
If your Honeywell TH6210U2001 isn’t functioning as expected‚ several common issues can be easily resolved․ First‚ check the batteries‚ even if the thermostat is hardwired‚ as they often power the display․ Verify proper wiring connections‚ referencing the wiring diagram in the installation manual PDF․
If the display is blank‚ ensure the power supply is active․ For connectivity problems‚ confirm your Wi-Fi network is functioning and the password is correct․ The PDF manual provides a detailed troubleshooting section addressing error codes and offering step-by-step solutions for frequent problems‚ saving you time and potential service calls․
Understanding Error Codes
The Honeywell TH6210U2001 utilizes a series of error codes to diagnose system malfunctions; These codes‚ displayed on the thermostat screen‚ pinpoint specific issues‚ ranging from wiring problems to sensor failures․ The installation manual PDF contains a comprehensive list of these codes and their corresponding meanings․
Decoding these errors allows for targeted troubleshooting‚ avoiding unnecessary component replacements․ Common codes relate to heating/cooling system failures‚ communication errors with connected devices‚ or sensor inaccuracies․ Referencing the PDF ensures accurate interpretation and guides you through the recommended corrective actions‚ potentially resolving issues independently and efficiently․
Wi-Fi Connectivity & Mobile App Setup
The Honeywell TH6210U2001 offers remote control via Wi-Fi connectivity and the Honeywell Home mobile app․ The installation manual PDF provides a step-by-step guide to connecting your thermostat to your home’s wireless network․ This process typically involves downloading the app‚ creating an account‚ and following the in-app instructions to pair with the thermostat․
Successful connection enables features like remote temperature adjustments‚ scheduling‚ and energy usage monitoring․ The PDF manual details troubleshooting steps for common connectivity issues‚ such as incorrect password entry or network compatibility problems․ Utilizing the app enhances convenience and allows for optimized home comfort management‚ even when away from home․
PDF Manual Download & Resources
Accessing the Honeywell TH6210U2001 installation manual PDF is crucial for a smooth setup․ The official Honeywell Home website provides a readily available download link‚ ensuring you have the latest version with updated information․ Beyond the PDF‚ Honeywell offers a wealth of online resources‚ including frequently asked questions (FAQs)‚ video tutorials‚ and a comprehensive support knowledge base․
These resources cover everything from basic operation to advanced troubleshooting․ The PDF manual itself includes detailed wiring diagrams‚ programming instructions‚ and safety precautions․ Utilizing these materials empowers users to confidently install and maintain their thermostat‚ maximizing its functionality and lifespan․ Honeywell’s commitment to support ensures a positive user experience․
Warranty Information
The Honeywell TH6210U2001 thermostat is backed by a limited warranty‚ protecting against manufacturing defects․ Typically‚ this warranty covers the product for a period of one year from the date of purchase‚ though specific terms can vary․ Reviewing the warranty documentation – often included within the product packaging or available on the Honeywell Home website – is essential to understand coverage details․
The warranty generally covers repair or replacement of the defective unit‚ but does not extend to issues caused by improper installation‚ misuse‚ or normal wear and tear․ Maintaining proof of purchase‚ such as a receipt‚ is crucial for any warranty claim․ Registering your product online can streamline the claims process and ensure timely support․
Contacting Honeywell Support
For assistance with your Honeywell TH6210U2001 thermostat‚ Honeywell offers multiple support channels; Their official website‚ HoneywellHome․com‚ provides a comprehensive FAQ section‚ troubleshooting guides‚ and downloadable resources‚ including the installation manual in PDF format․ You can also reach Honeywell Support directly via phone; their customer service number is readily available on their website․
Live chat support is often offered for immediate assistance with common issues․ Additionally‚ Honeywell maintains an active presence on social media platforms‚ providing another avenue for inquiries․ When contacting support‚ having your thermostat’s model number and date of purchase readily available will expedite the process and ensure efficient resolution of your concerns․